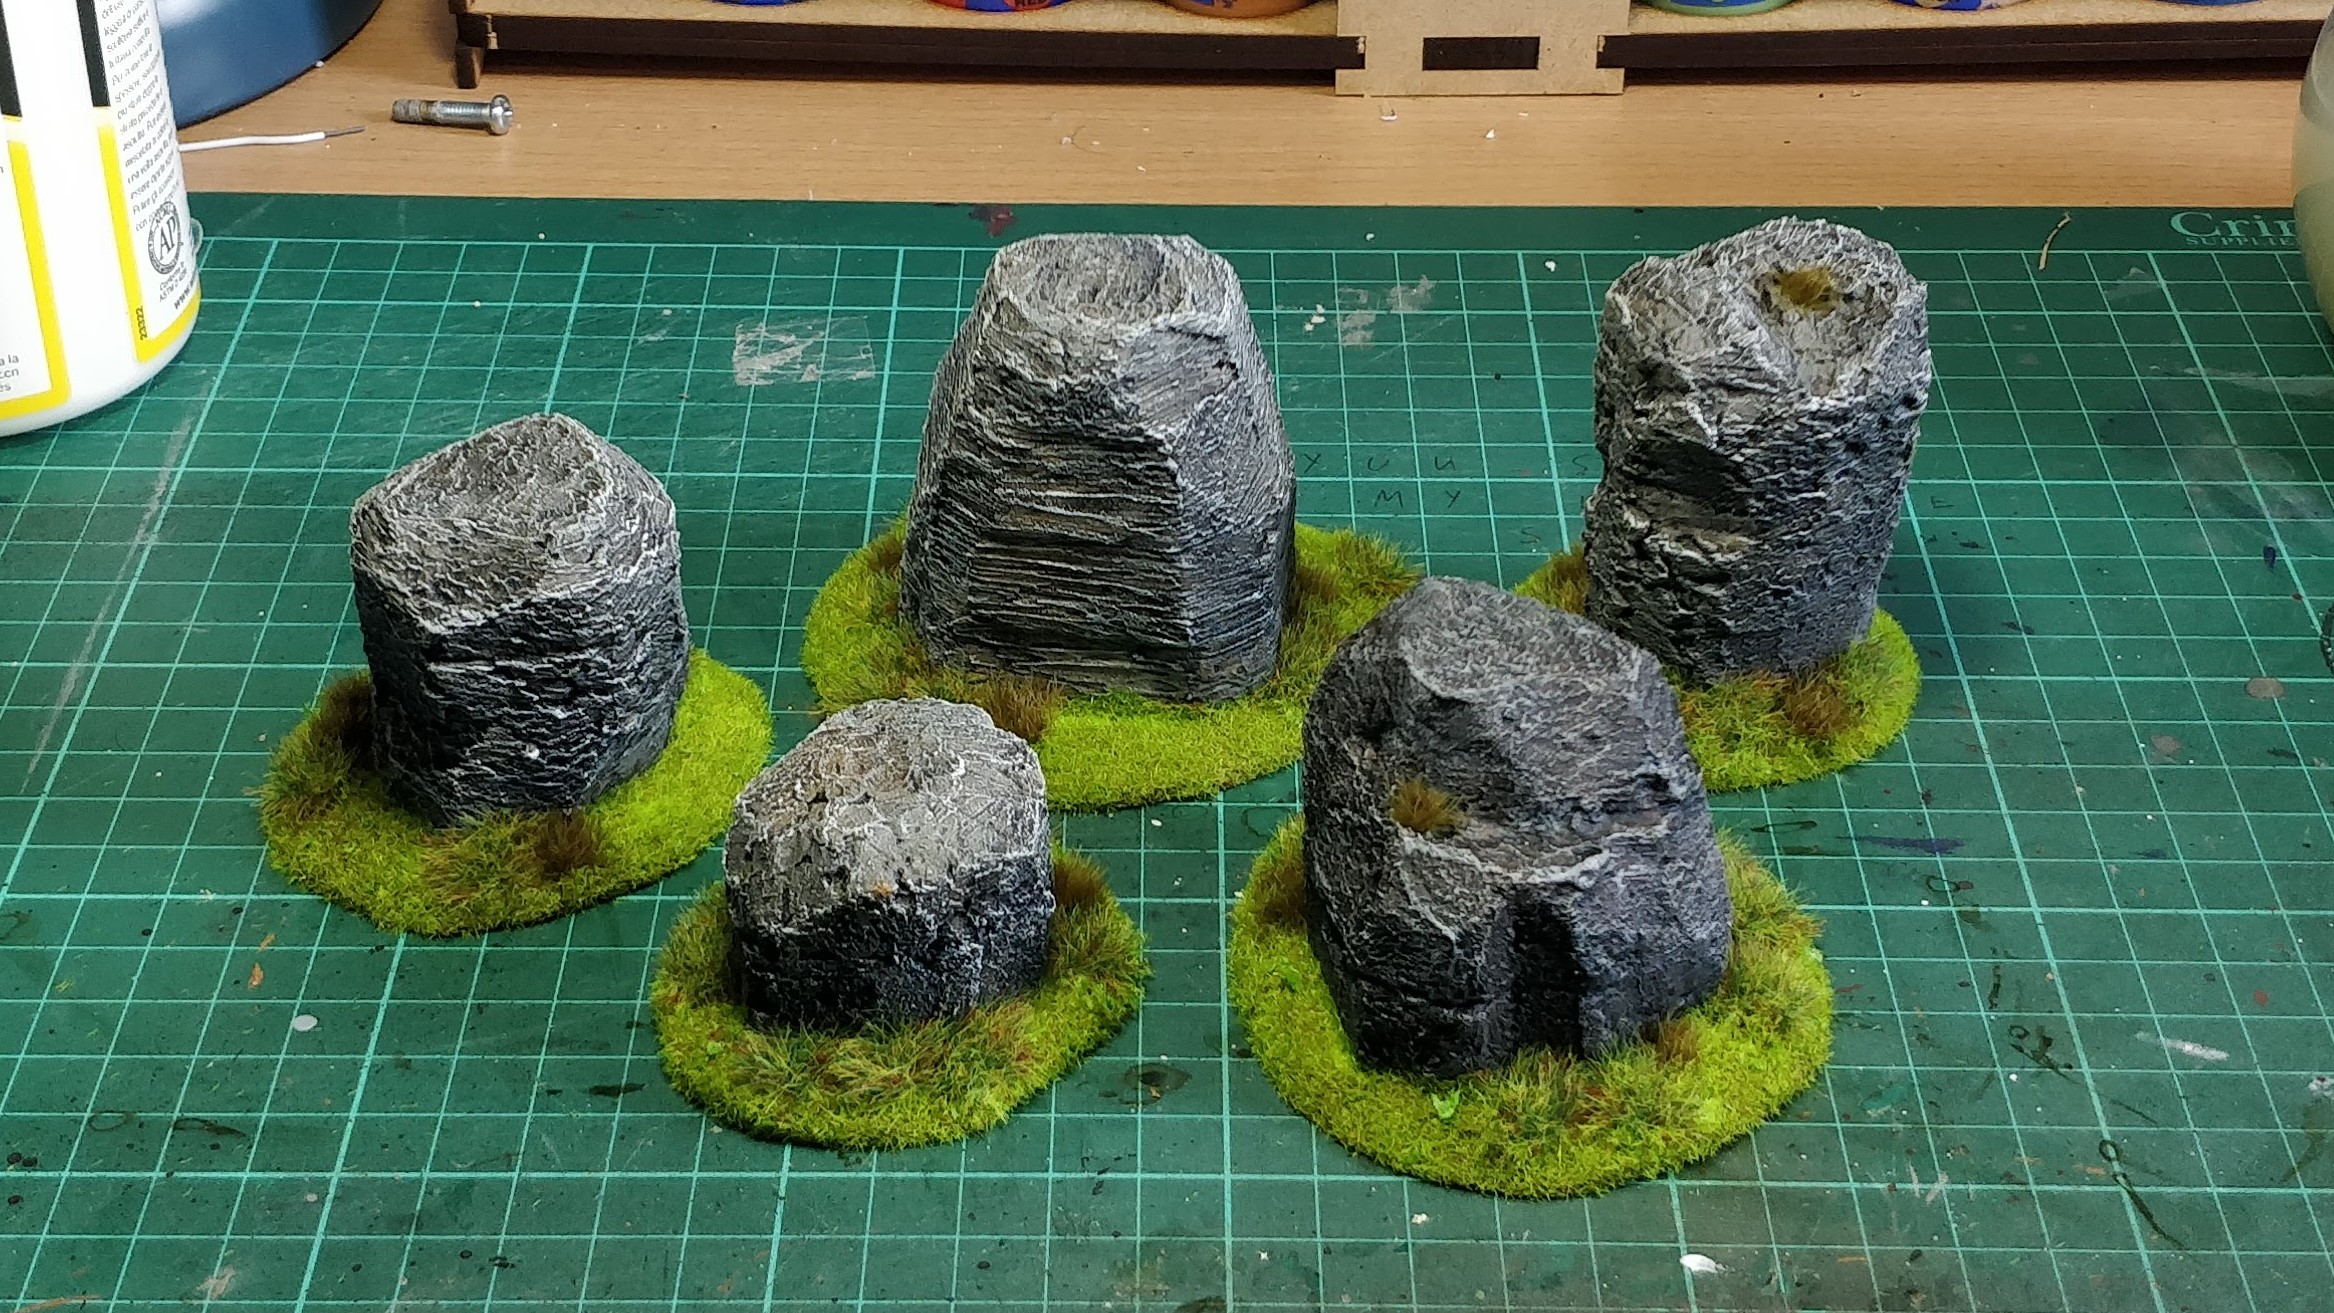
These simple, realistic standing stones are great for tabletop RPGs like Dungeons and Dragons or for scatter terrain in skirmish games or large-army wargames. The grassy base has more of a standard fantasy feel, but if you based them on muddy dirt or dusty desert sands they’d fit right in to futuristic settings like Warhammer 40,000. Or layer on some snow effects and they can be great natural obelisks for your games of Frostgrave!
You can follow along with the tutorial, or if you want to commission a set of these stones, please head on over to my commissions page for details.
Standing stones Construction
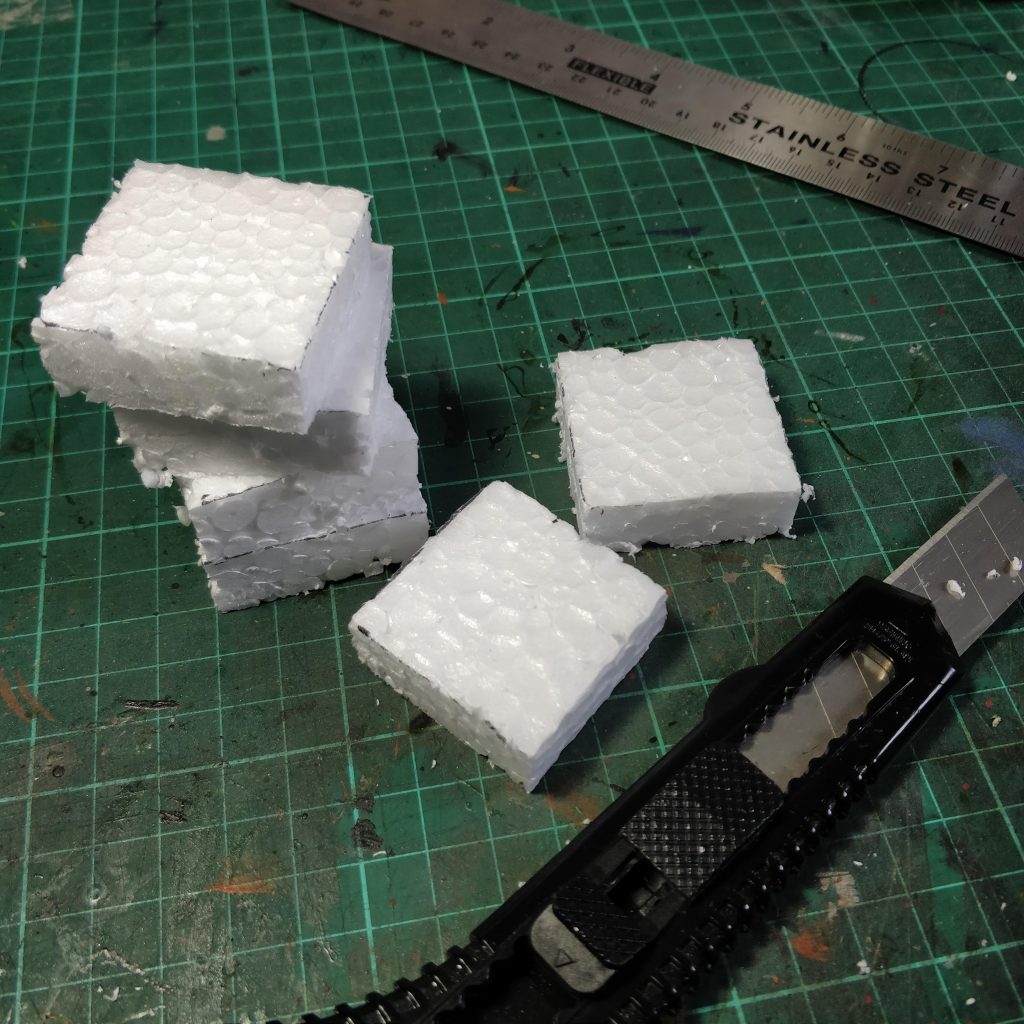
Step 1
This step will vary depending on the foam you use. I’m using leftover packaging from IKEA furniture so I needed to stack several layers on top of each other to reach the desired shape. If you’re using larger blocks, or some other material like XPS or PIR foam that comes in thicker sheets, this step might not be necessary.
Regardless of the foam you use, a sharp knife will produce a cleaner cut but if you’re using the cheap expanded polystyrene (EPS) foam like I am a sharp knife will stop the foam from breaking up into the bobbly texture.
I’m using expanding Gorilla Glue to stick the layers together because it’s perfect for grabbing into foam and creating a solid bond.
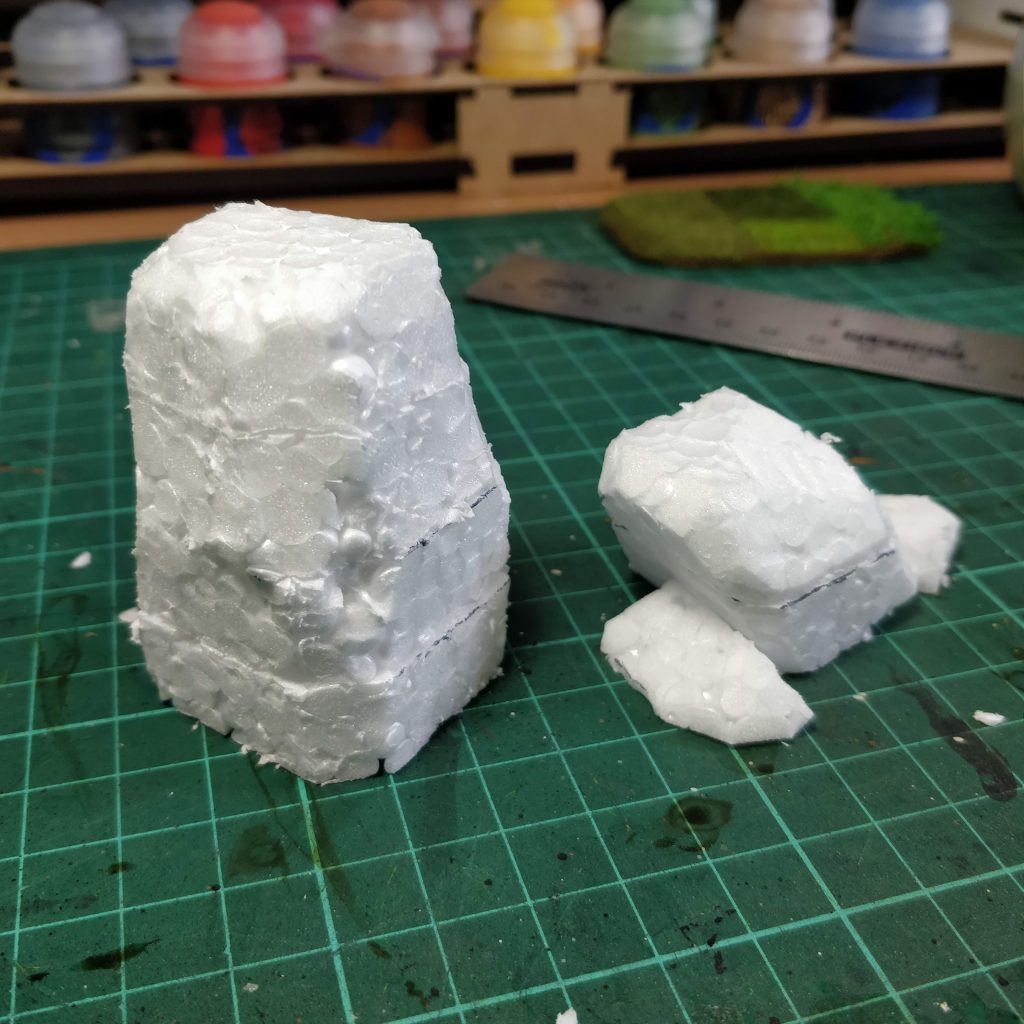
Step 2
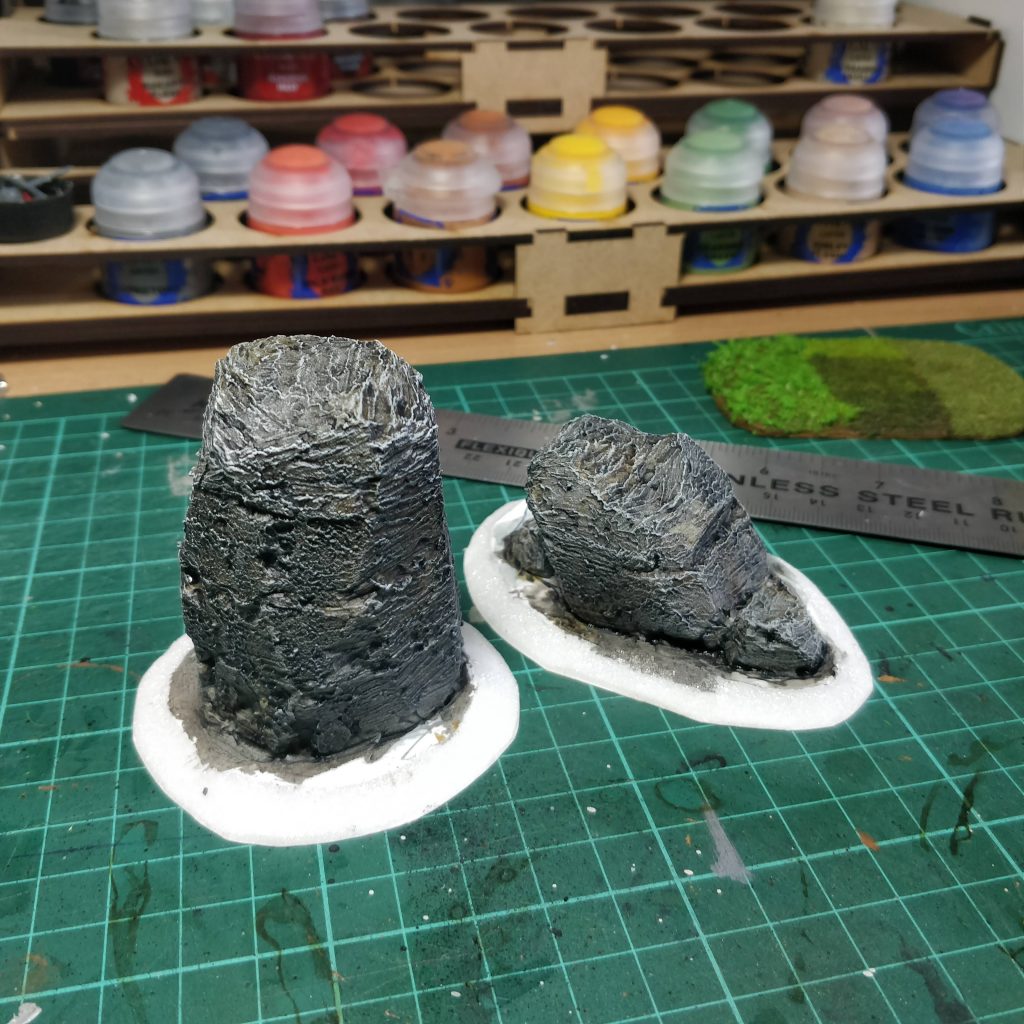
Trim the stack into a rough stone shape. Here I’m making two types; an intact stone pillar and a collapsed, broken stone. Break up the edges, and try not to leave any parallel lines to give the stones some scale-appropriate shape. I helped accomplish this by gouging out some smaller pits. Make sure to leave them deep enough that the texture we’ll add later doesn’t fill them in entirely.
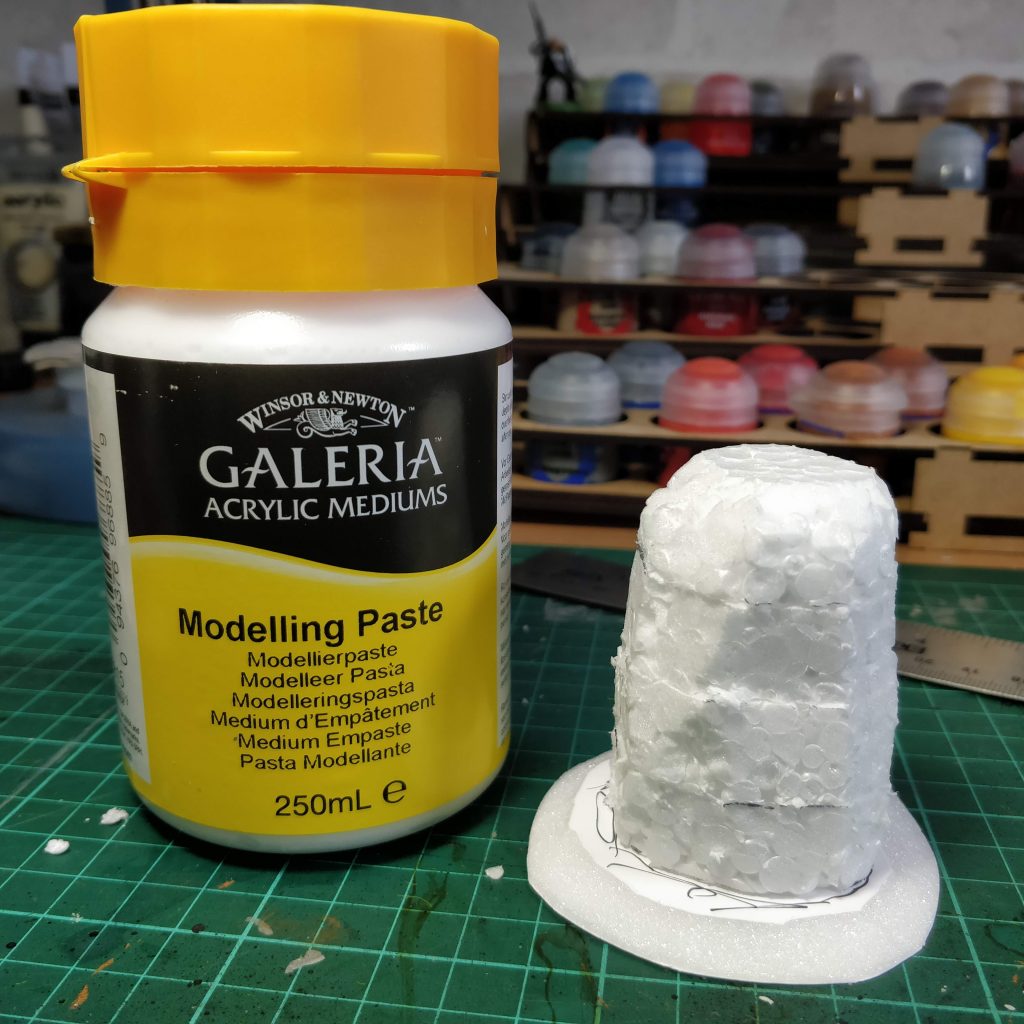
Step 3
Now time for the magic ingredient: Modelling paste! This stuff is a thick acrylic medium that air hardens to be solid yet slightly flexible. This means your stones should stand up to normal tabletop use without getting damaged.
It takes texture really well, and has a nice long working time that lets us manipulate it into the texture we want easily.
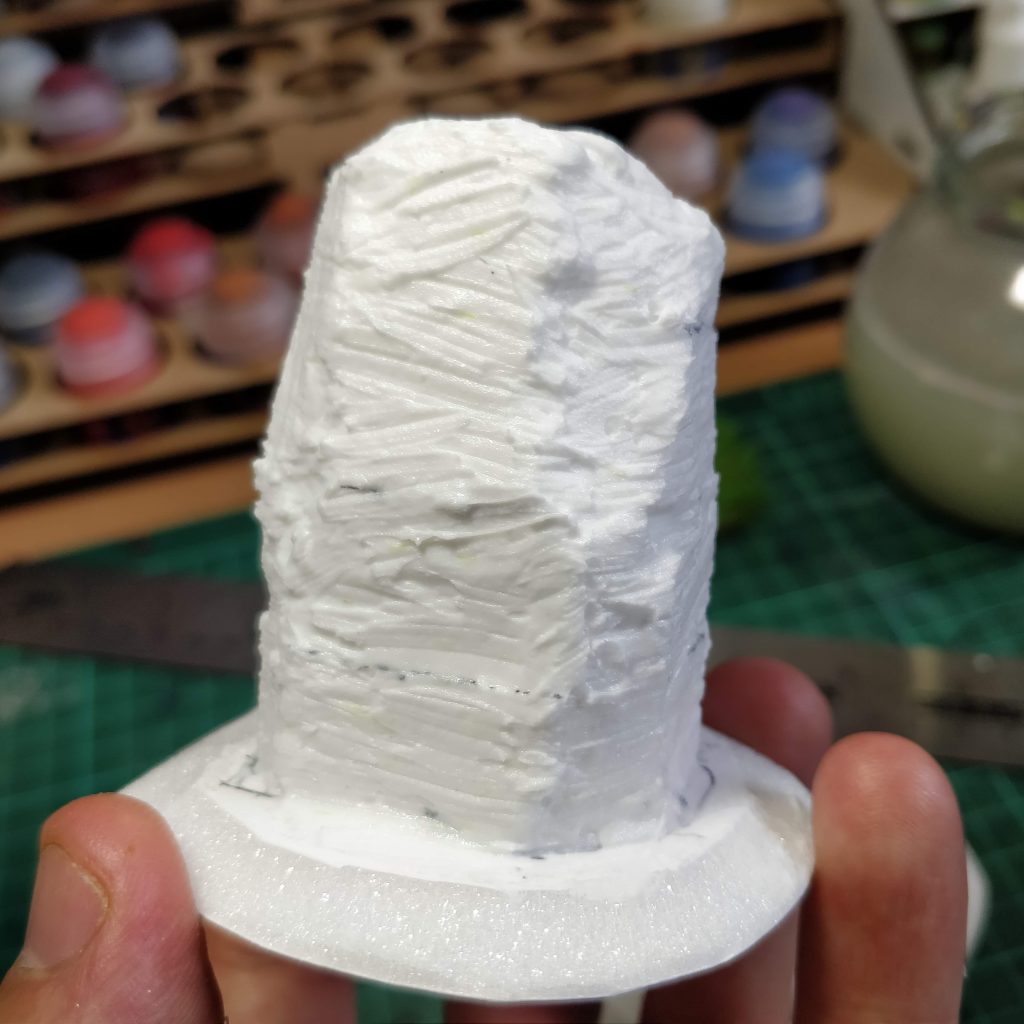
Step 4
Using a stiff bristled paintbrush, create roughly horizontal lines in the modelling paste. We’ll add finer texture in the next step, but this starts to create the rocky texture we’re going for.
What we’re aiming for here is to completely cover the texture of the foam. If you’re using an extruded foam like XPS or PIR this will be less of a problem. In my case the cheap IKEA expanded polystyrene foam has the characteristic bobbly, spherical texture to it that looks decidedly un-stone like.
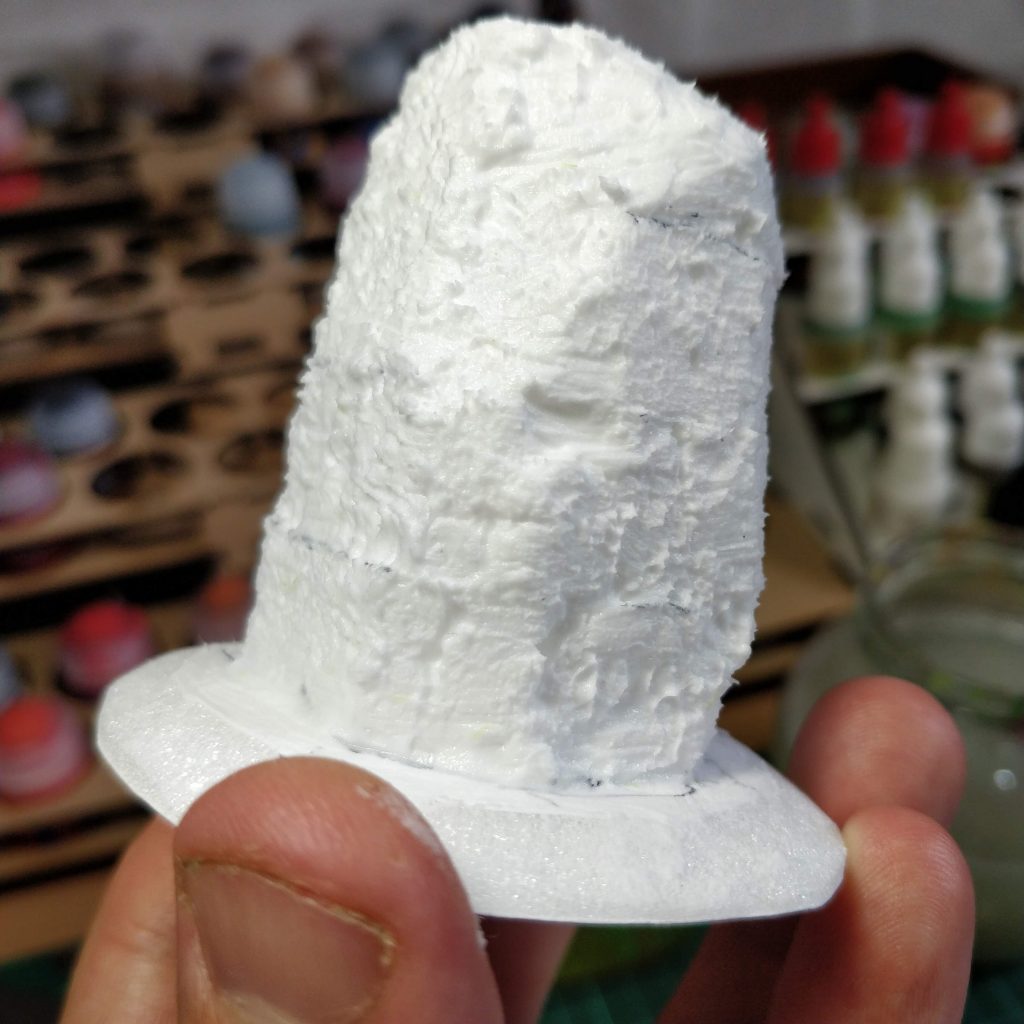
Step 5
Leave the paste to partially dry for about 10 minutes, and then use the same stiff bristled brush to stipple additional texture. Rather than brushing across the surface, stippling means use light stabbing motions with the brush held perpendicular to the surface.
Letting the paste dry slightly will produce a subtler effect and lean to a finer grain texture. If the paste is too wet it will produce more pronounced peaks which is not what we’re after here. If that happens, just brush the peaks back out to horizontal lines and wait another few minutes for the paste to dry more.
Painting Realistic stone
Step 1
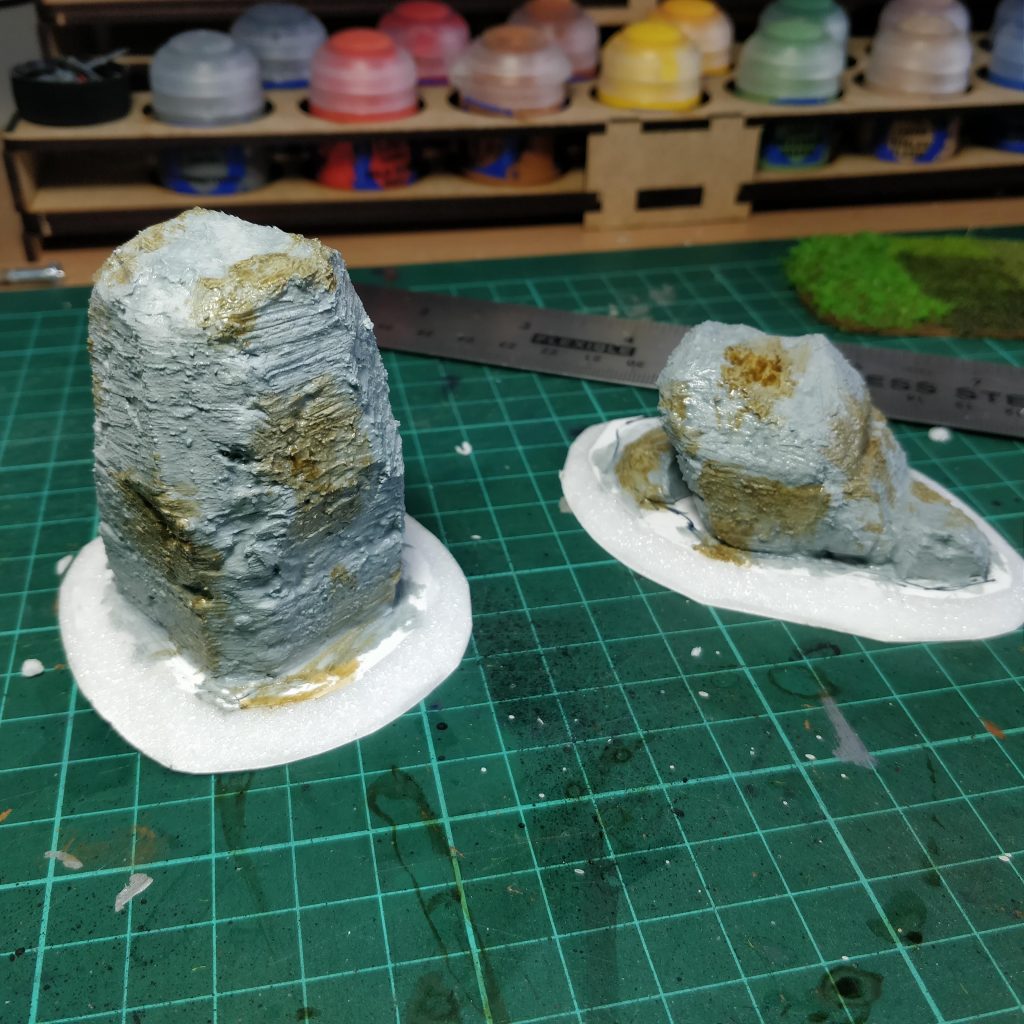
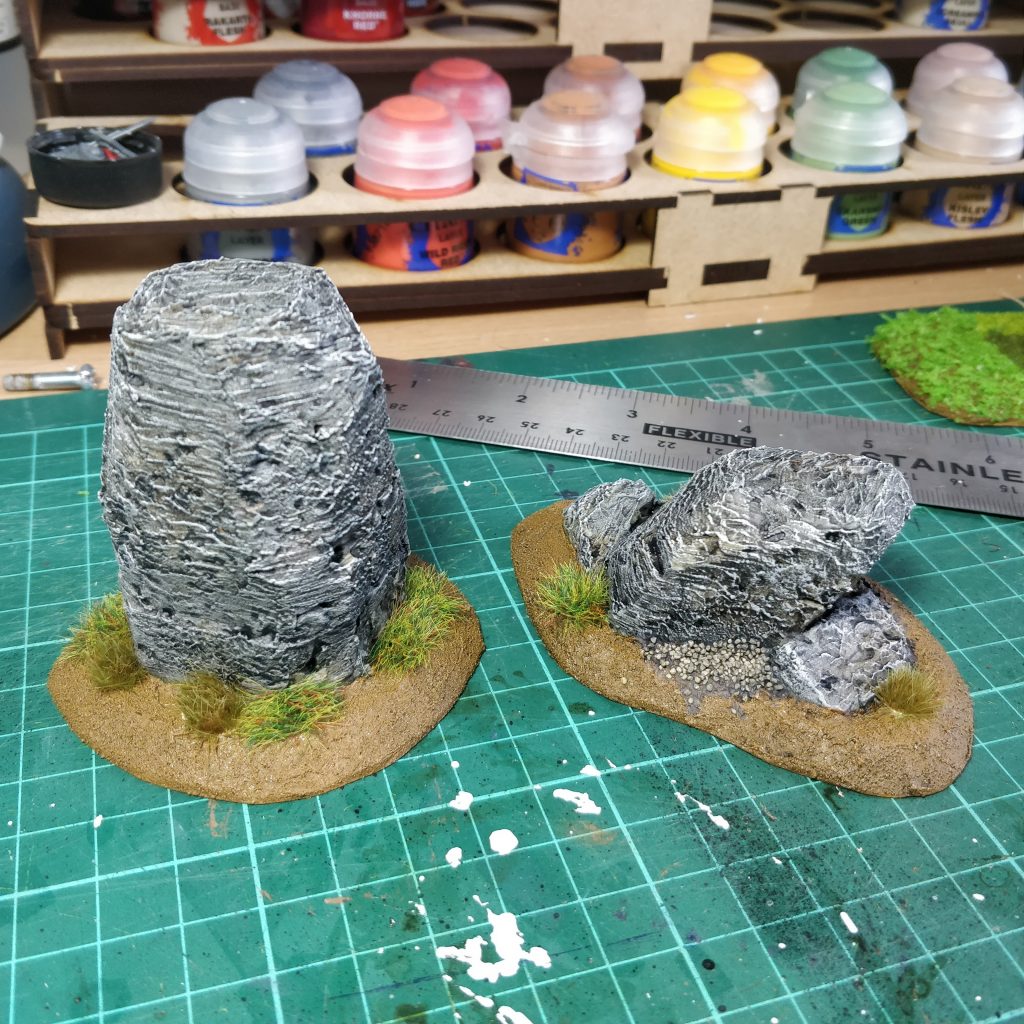
For painting our standing stones, we’re going to use a very simple realistic technique Leopard spotting which has been used by modellers for years. You can use literally any paint, ink or wash for this step, but for this I had just bought some Citadel contrast paints and wanted to see how they performed. The two used here are Skeleton Horde and Apothecary White. Cover the foam with the grey colour, and then dab on spots of brown over the surface. Roughly blend them together, but don’t worry about being too neat.
Step 2
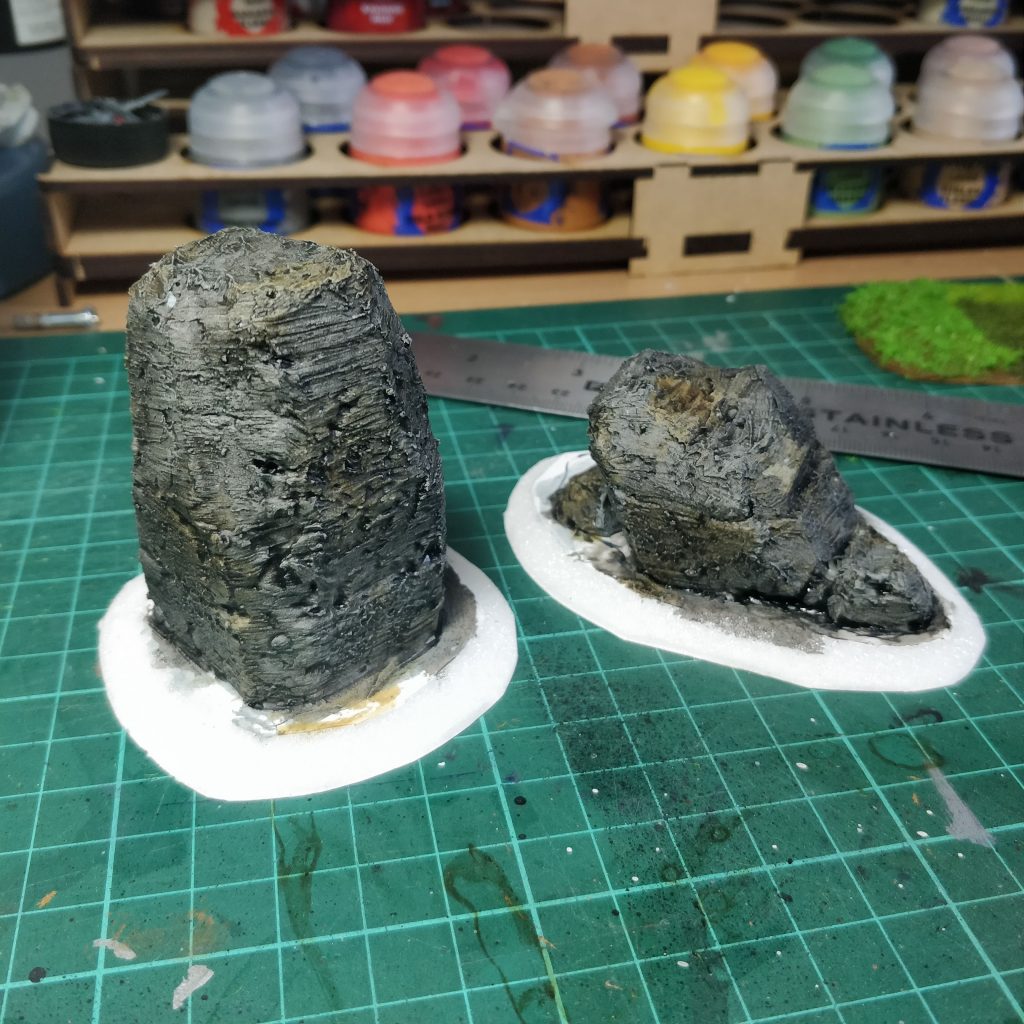
Coat the entire pillar in a black wash. For these I used a homemade wash of black paint, water and a couple of drops of washing up liquid.
Step 4
Drybrush the pillar with a light grey. To drybrush, load a brush up with paint and then wipe most of it off on a porous surface. Then lightly dust the surface with the brush to only leave paint on the raised surfaces.
I have a habit of unloading the brush on kitchen roll, scraps of cardboard or the back of my hand depending on how in the groove I am.
The idea with drybrushing is to highlight the raised details and really make the piece pop. If the grey still looks quite muted, an additional highlight of almost pure white, applied very lightly in a top down motion, can help the form of the piece stand out.
Step 5
Finishing the base is really up to you, to fit the style of your board, terrain, or diorama. For mine I used Vallejo basing paste and some grass tufts. For the broken pillar I also used some larger model railway ballast around the base to represent smaller chunks of broken rock.