These baby wipe cobwebs are a little fiddly to get started with, but once you build up a small supply of the base materials they’re easy. They’re perfect for adding atmospheric flavour to tabletop roleplaying games like Dungeons and Dragons, or for adding to horror-themed dioramas.
Basic Principle
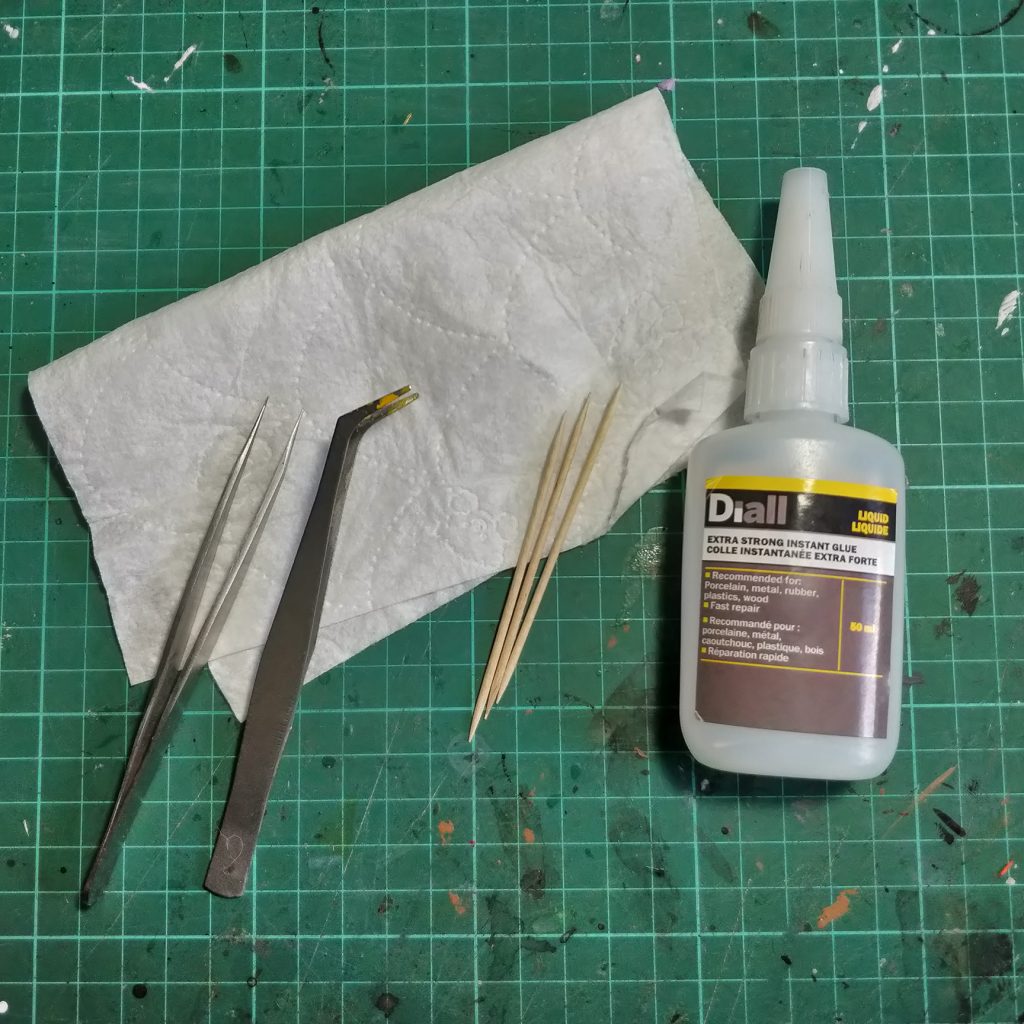
Materials
As you may have guessed, the basic material used for this technique is the baby wipe and… that’s pretty much it. The only other thing you need is thin superglue. For manipulating the wipes into the desired shapes, I use a combination of tweezers and cocktail sticks.
I have a couple of types of tweezers but I would recommend the precision modelling tweezers (on the left). They make the first steps much, much easier.
The cocktail sticks are useful for applying superglue to small areas when adhering the baby wipes to surfaces.
Step 1
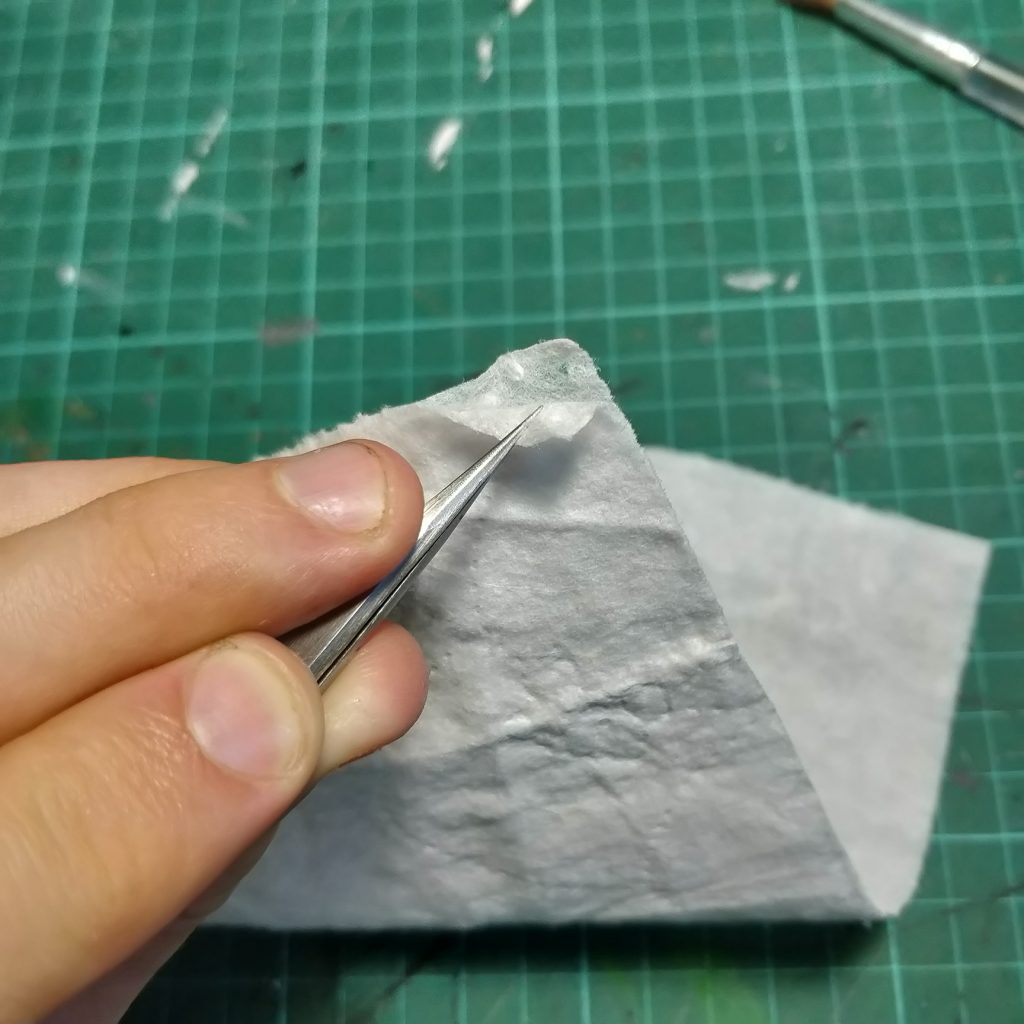
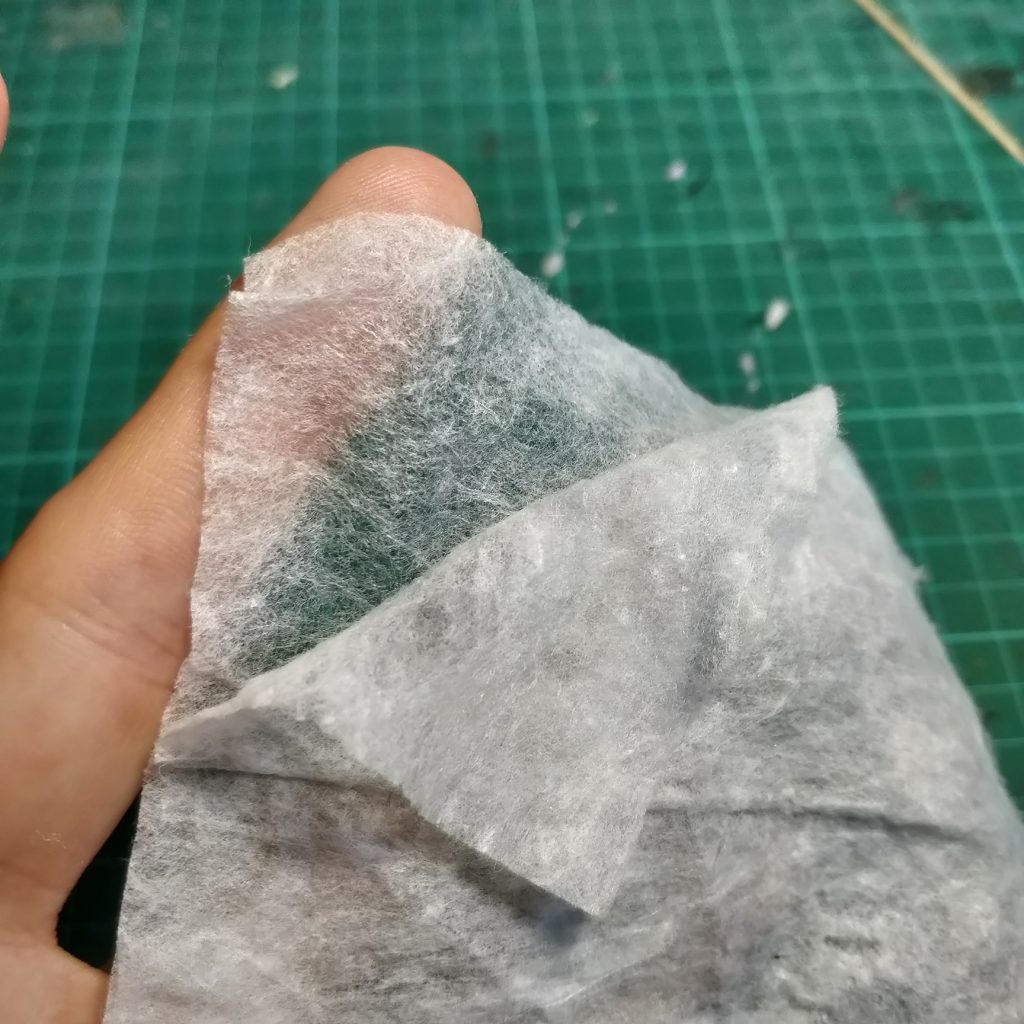
This is far and away the fiddliest step. The secret to this lies in the construction of baby wipes (what a sentence). Like toilet paper, baby wipes are made of several much thinner sheets bonded together. Using tweezers and some patience, you can start to delaminate these individual sheets.
I find it best to gently pull on one edge, near a corner, until it starts to fray. Then, using tweezers, slowly start to pull the two halves apart. Take it slowly and you should be able to separate the sheets entirely. If the sheets start to tear, you’re going to fast.
Step 2
Once you’ve got two sheets, do the same again. At this point the individual sheets are extremely thin and, in large sheets, are very fragile. Again, take it slowly and gently peel apart the layers. You’re looking for layers similar to the underneath layer in the picture – as thin as possible, and varying in opacity. You can see how dusty and cobweb-ey they look!
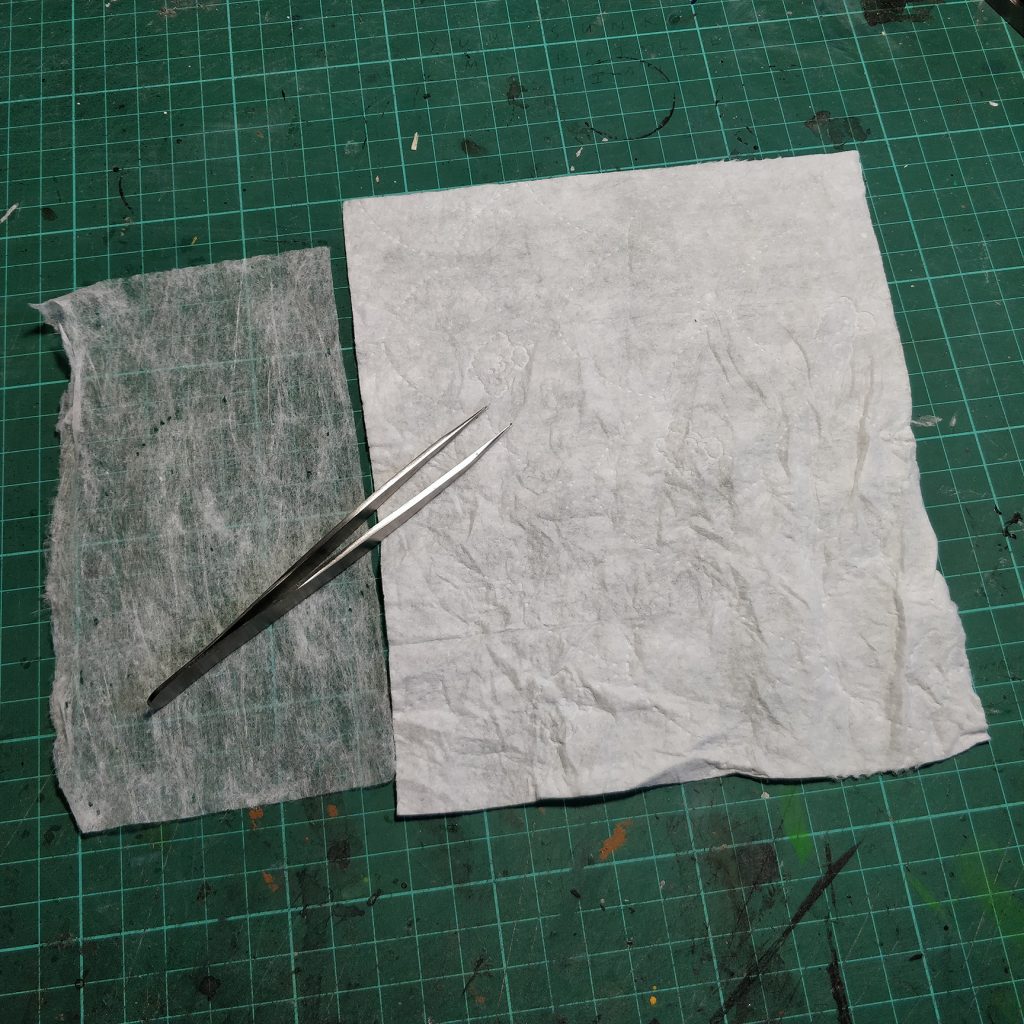
Basic Cobweb material
This picture shows the starting baby wipe on the right and the final result you’re aiming for on the left. Notice how much thinner and translucent the separated layer looks.
Since this stage is kind of a pain in the butt, it’s best to get it out of the way at the start of a project and stock up on several sheets of the basic material before continuing.
Technique The first: Basic Spookyness

Step 1
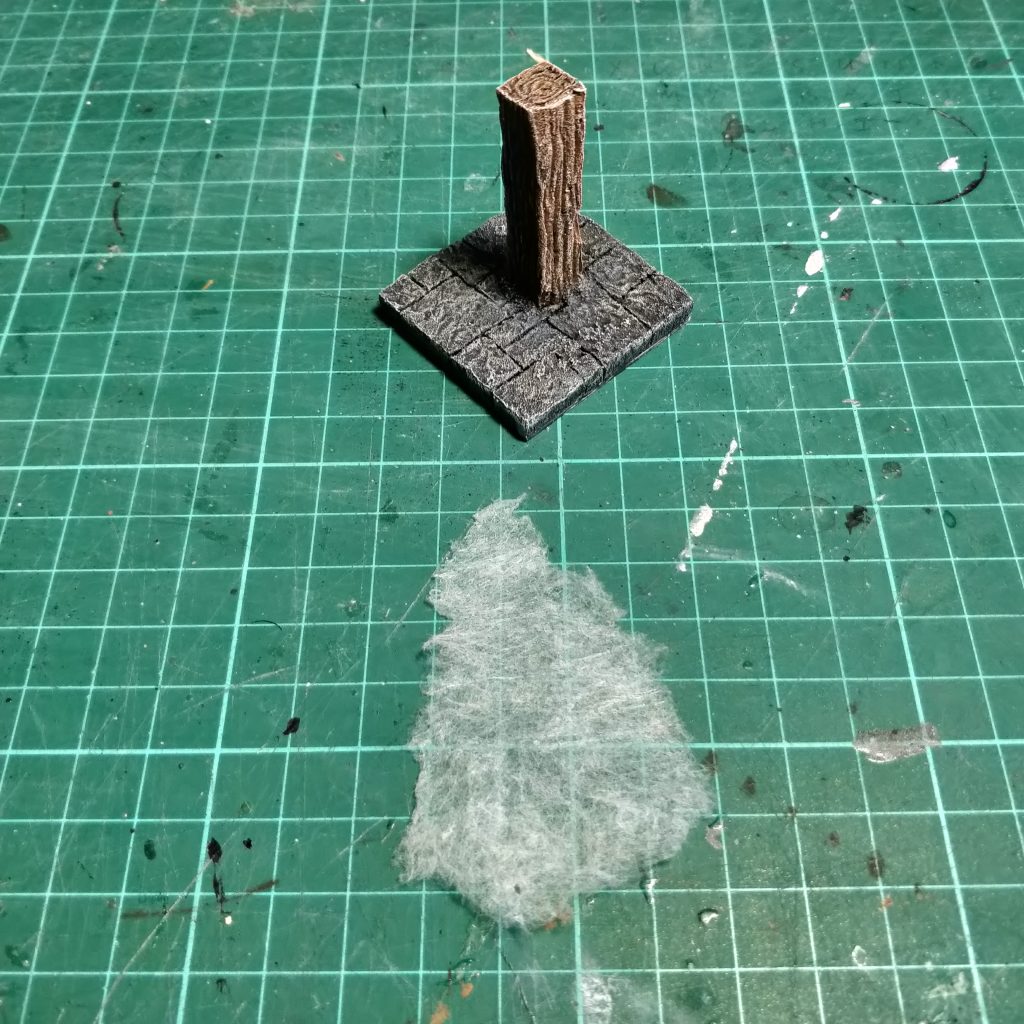
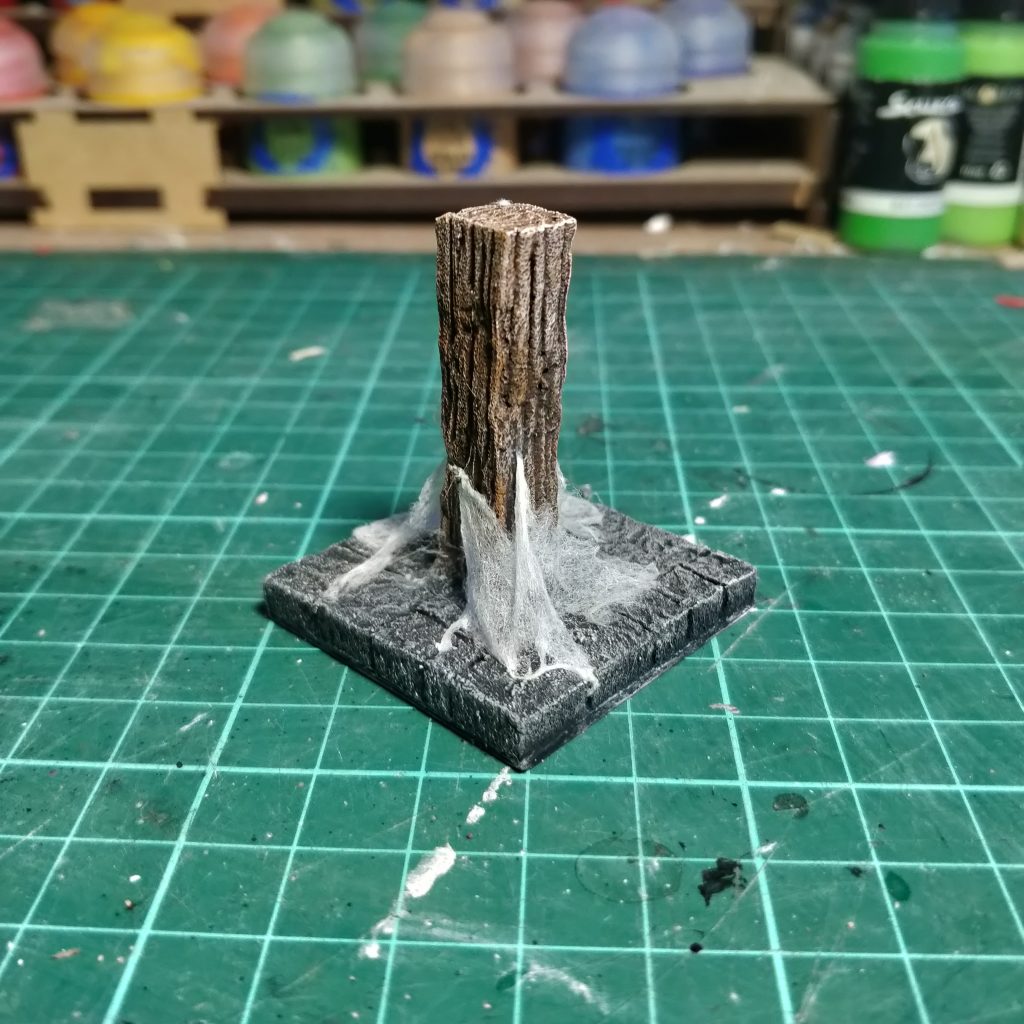
Start by tearing a flattened teardrop shape out of the basic cobweb material. The piece pictured here is actually a bit big and I ended up making it smaller before moving on to the next step
Step 2
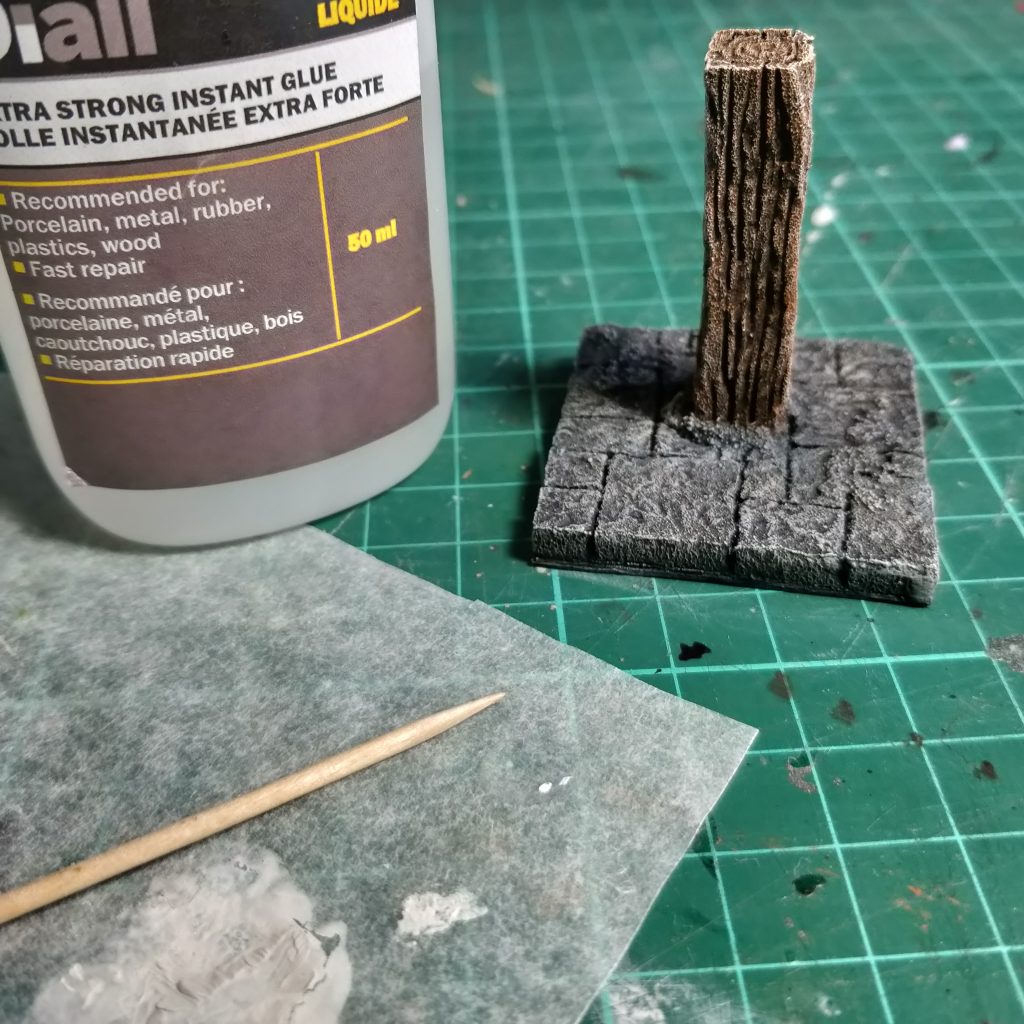
Applying the cobwebs is a fairly simple but delicate process. Using the cocktail stick, apply a small amount of thin super glue to the contact point. In this case I started at the top of the post and the pointed end of the web.
Touch the section of web you want to stick to the glue, and use the other end of your cocktail stick to press it in place.
Once you have the first anchor point set, you can start to pull the web into place and create the shape you want.
Step 3
Here’s the web after some work. After the initial anchor point, I find it’s easiest to apply some glue to the end of the cocktail stick, and then use that to pull the edge of the web to the desired location. Push the web in to the surface, and then twist the cocktail stick away from the point of contact.
It’s a little fiddly but you’ll seen get the knack for it.
You can also poke smaller holes in the web to give it a more tattered, worn appearance.
Step 3 (cont.)
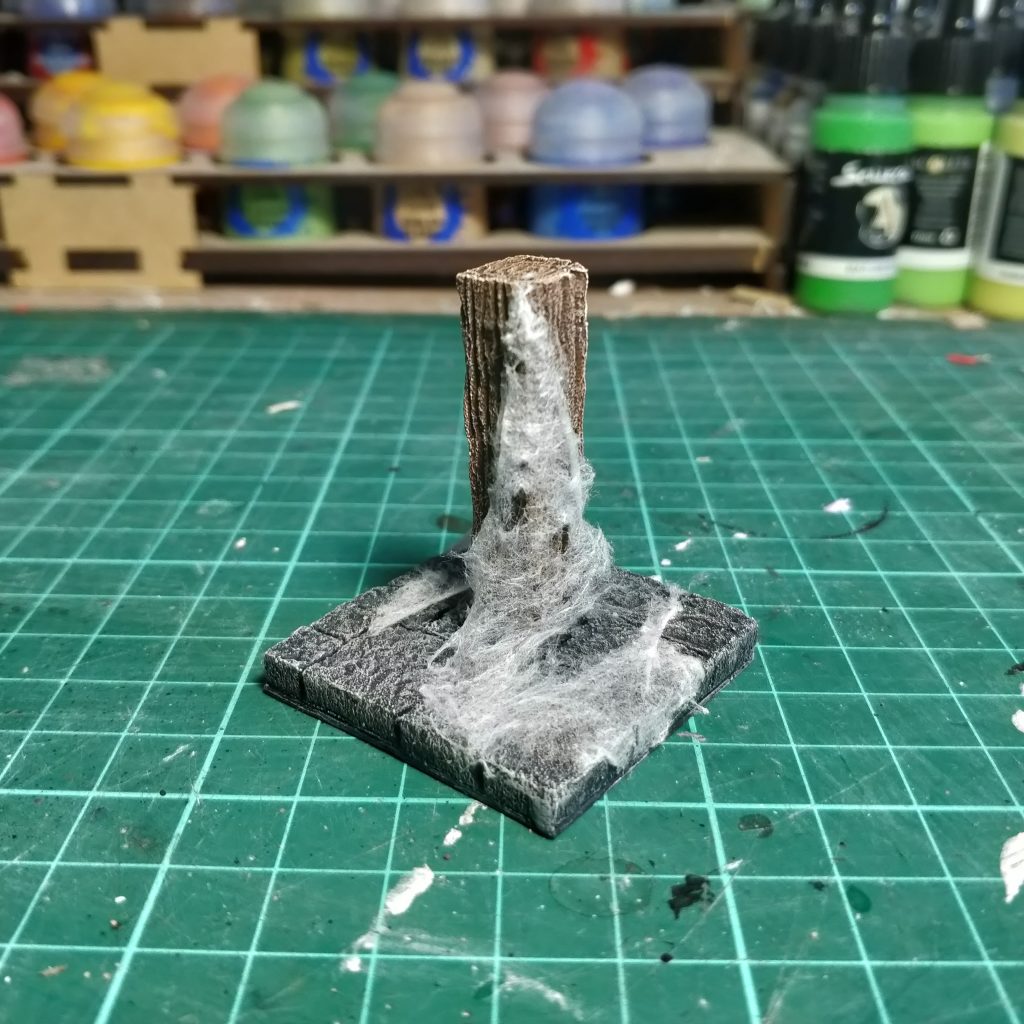
For the other side of the post I followed the same process with a smaller section of web. In order to make the initial connection point stronger, and to give it a more defined shape, gently twist the baby wipe at the corners to make twisted strands, and use these as your anchor points.
Keeping a roughly triangular shape by making use of three connections gives a nice defined shape that’s very effective, and instantly recognisable.
Technique the second: Larger Webs and extra smut (not that kind)

Step 1
Despite what I just said about pleasing triangular shapes, you can also get a very effective look by draping more rectangular shaped pieces. It’s still vaguely triangular, but seems more sheetlike, as you’d get draping corridors of haunted houses or ancient tombs (Alfred Molina’s shocked face optional).
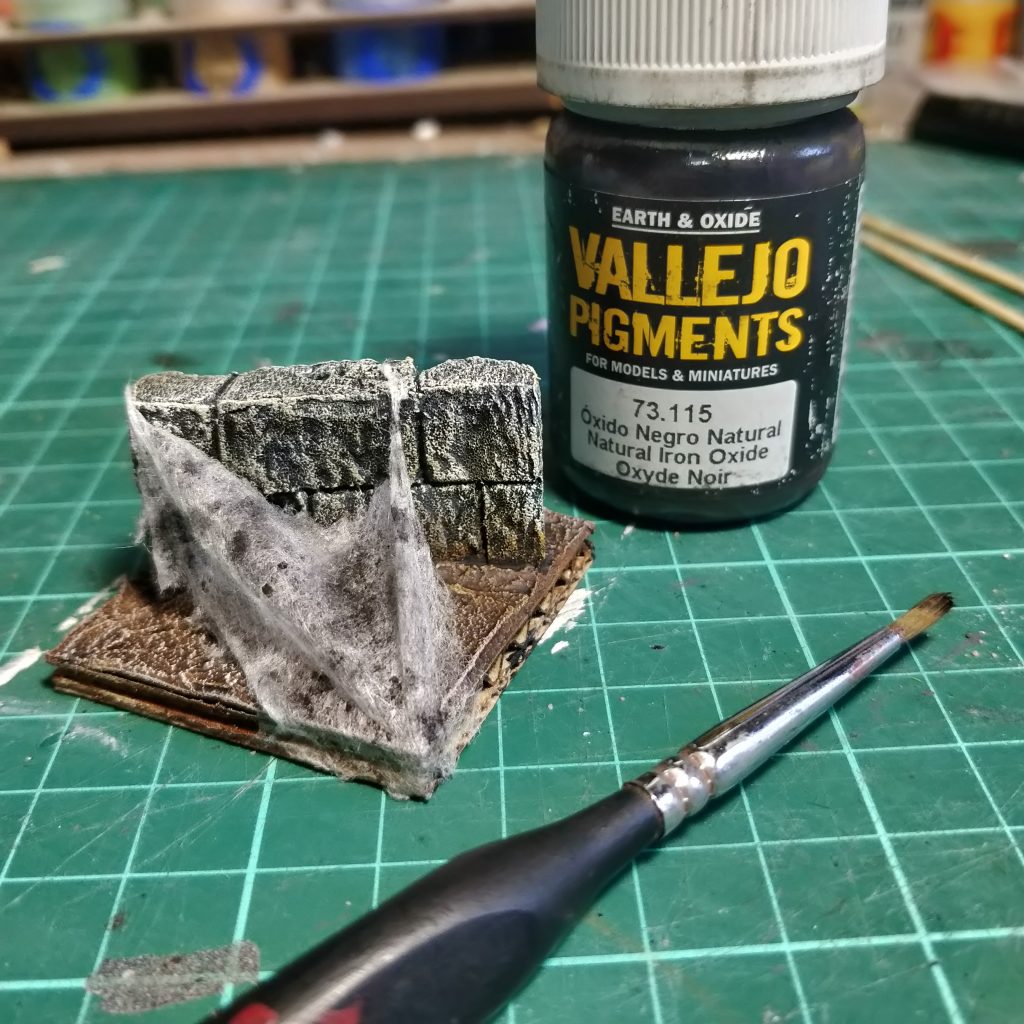
For added aging I stippled on some dark pigment powders from Vallejo, although this could also be done with ground up chalk pastels. In a pinch, pencil graphite would also work also this is pretty shiny and so could look a little odd.
Technique The Third: Making Cobwebs Game-Proof
Glue = Tough
I discovered this by accident while trying to simulate dewdrops on the webs. After trying to mist them with varnish from a distance with little success, I tried dropping beads of superglue on to patches, hoping that it would bead up. It did not.
What it did do is immediately soak into the web and turn it transparent. However when it dried the baby wipe returned to it’s normal web-like, dusty looking look, except it was rock hard and pretty resistant to further prodding.
I’ve found that the best result is achieved by applying the glue in little drops and waiting for it to soak in completely. Then apply more until the whole surface is covered. This stops the material from getting oversaturated which can make it dry clear (which we don’t want).
Conclusion
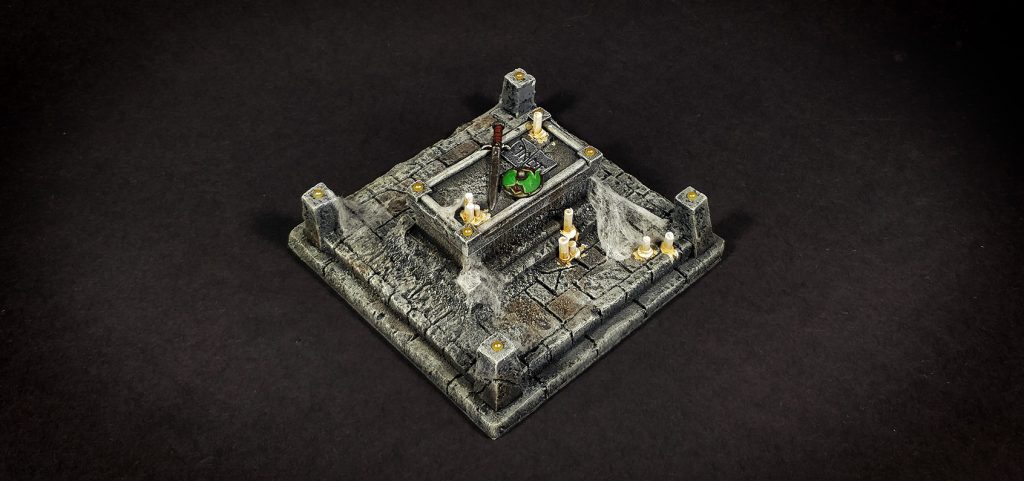
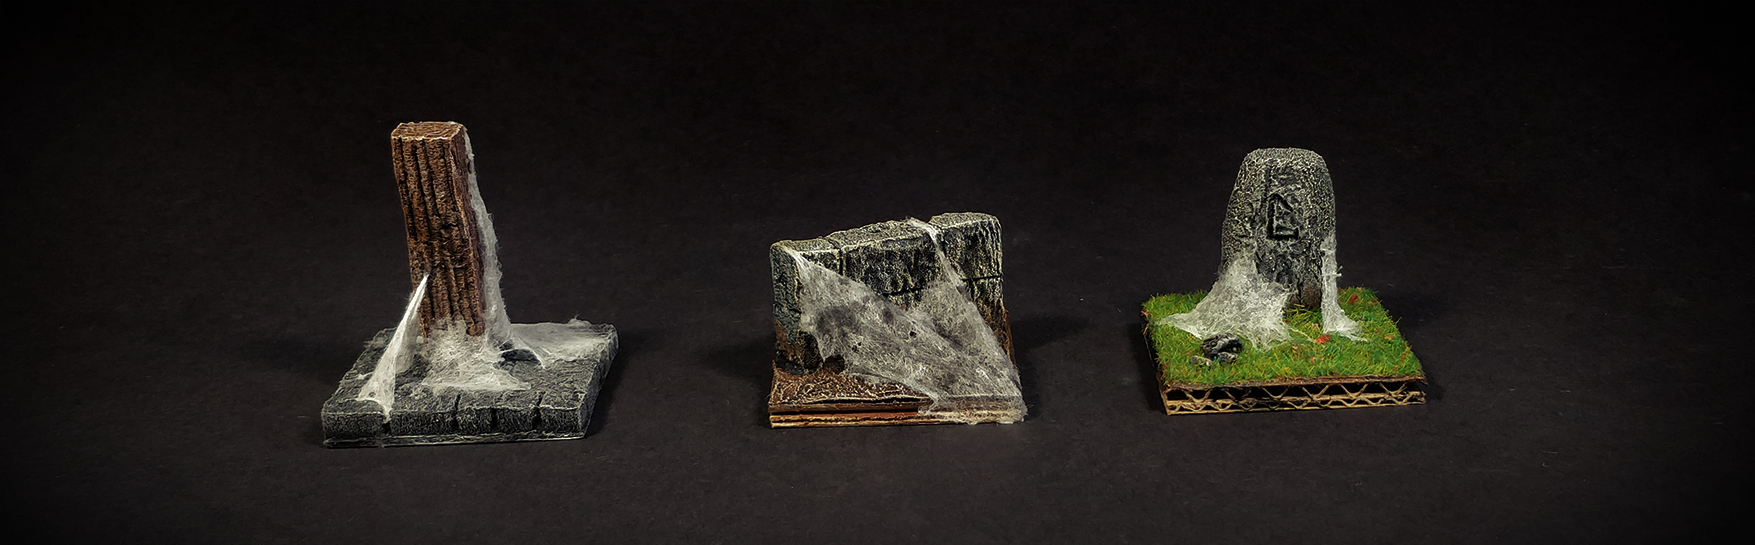
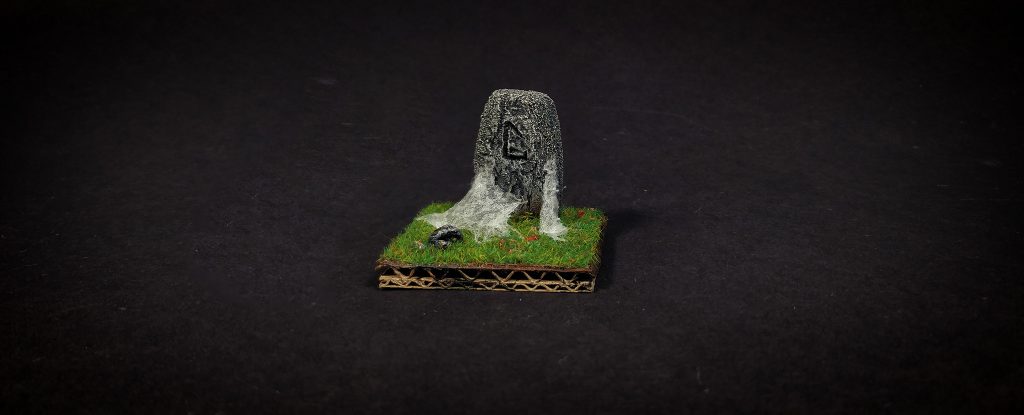
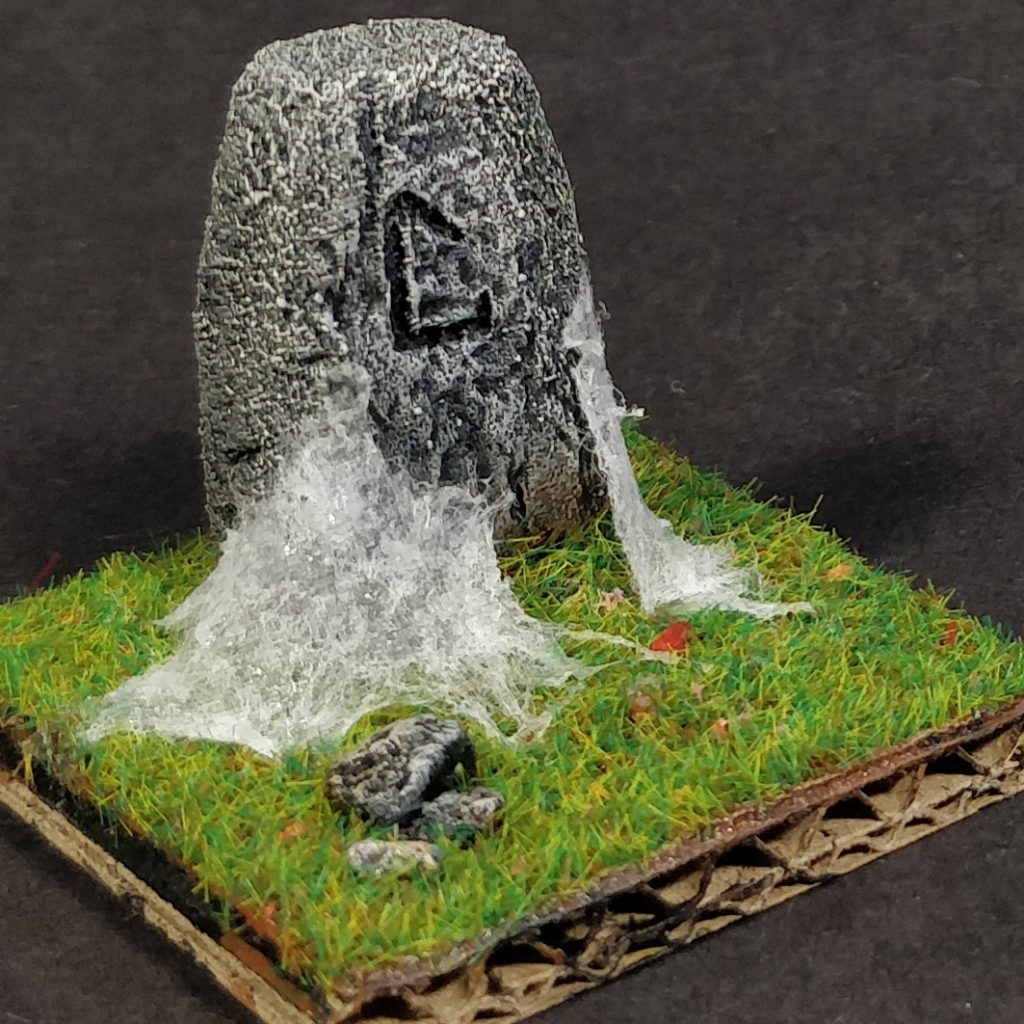
These baby wipe cobwebs are a little fiddly to get started with, but once you’ve built up a stock of the basic materials they are pretty satisfying to use on dioramas, or for gaming pieces. They could also be used on scenic bases for zombies, skeletons or other creepy ancient monsters. Below you can see where I’ve used this technique to make a tomb terrain piece look suitably ancient.
Of course, if you don’t want to spend your crafting time meticulously picking apart baby wipes and getting strange looks from your loved ones, you can always commission me to make something spooky for you!